Solving the Mystery of Chamfered Floor Joists
Or, What is Behind that Wall?
If you live in an older home, (and we’ll just say built sometime between the 1880’s and the 1960’s), and you’ve never lived through a bathroom renovation, what’s behind those walls and under the floor might come as a bit of a surprise. Often, these hollow spaces beneath the floorboards might be mini-time capsules containing newspapers from the 1920’s, or whiskey bottles from the 1930’s. Ever wonder why walls aren’t square and plumb in an old house? Empty whiskey bottles stuck in the wall might be a clue. There is both the myth and reality of old houses that exists in every old house neighborhood.
But first, getting to the bare joists (floor) and studs (wall) can be a challenge. Older, mudset bathrooms have mortar beds on the floors often 3” to 5” thick and tile wainscoting on walls set in 1 1/2” – 2” of mortar and wire mesh.
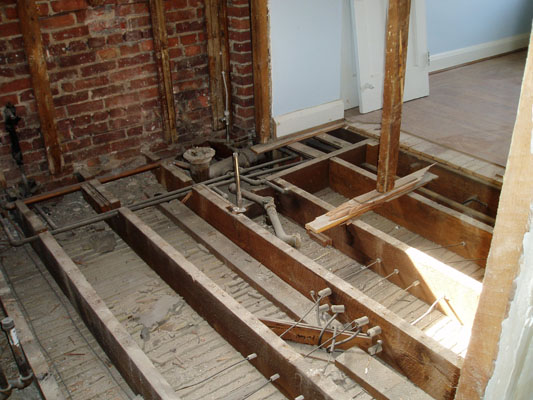
Illustration 1: Exposed Bathroom Floor
Beyond yesterday’s news and someone’s lunchtime libations, other more important elements exist beneath the floors and walls. Aside from sawdust, houses constructed before 1921 will contain knob and tub wiring. Porcelain knobs held copper wire along the sides of joists and studs, while the tubes isolated wire that had to be drilled through the joists. Outlawed after 1921 for safety reasons, active knob and tube still exists and often in close proximity aging plumbing supply and drain lines. Needless to say, knob and tube should be eliminated where possible.
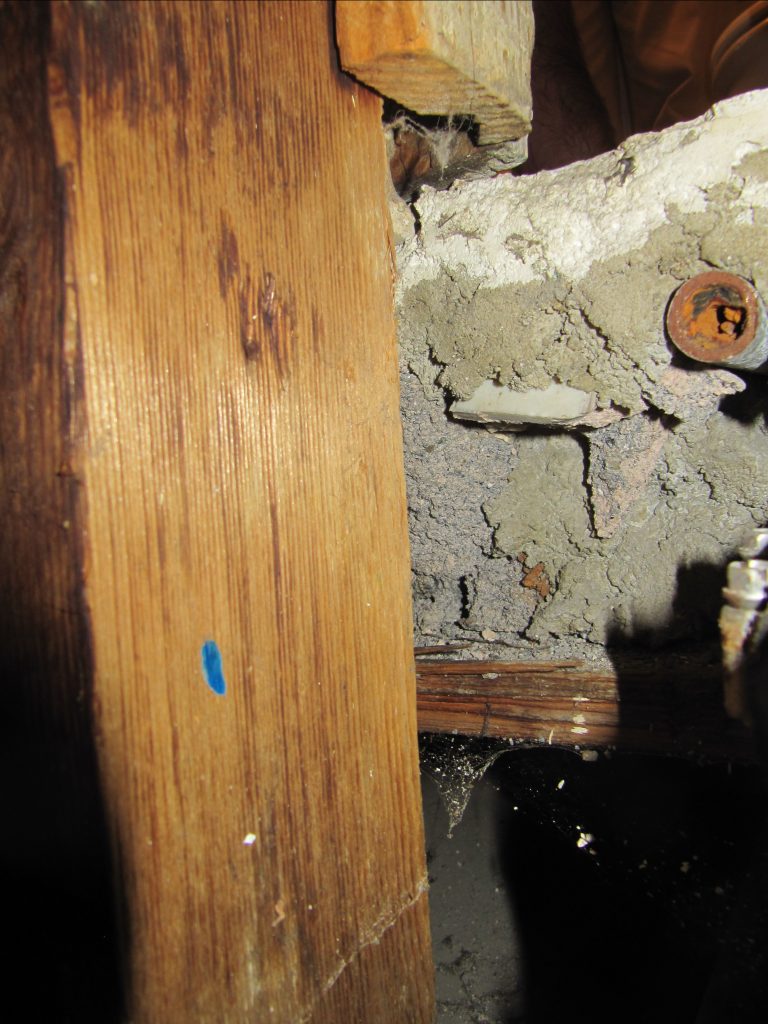
Illustration 2: Cross Section of a Bathroom Floor
Illustration two shows a cross section of a bathroom floor, showing a roughly 5” mortar bed resting on sheathing between the floor joists. The galvanized pipe is corroded so that only a trickle of water could pass. Galvanized pipes and lead drum traps should be replaced when renovating the bathroom. This photo illustrates some of the difficulty in remodeling old bathrooms with mudset floors.
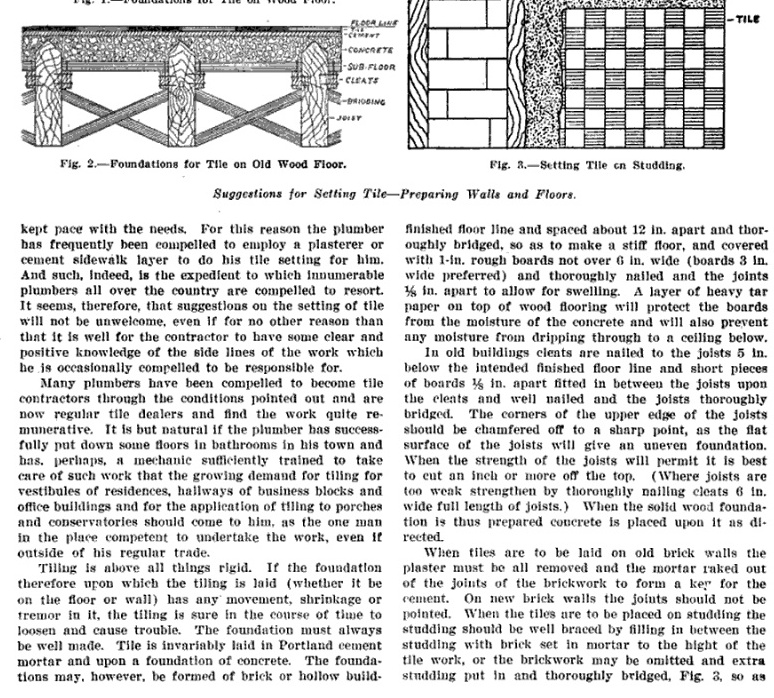
After years of tearing out mudset floors, we nearly always encounter floor joists that were chamfered at the top. Having never heard a satisfactory response as to why the joists were invariably chamfered, I found this illustration and explanation from Suggestions for Setting Tile, by Karl Langenbeck, 1907.1 “The corners of the upper edge of the joists should be chamfered off to a sharp point, as the flat surface of the joists will give an uneven foundation.” Well that’s it and that makes sense. The chamfered allowed the the mortar bed to be laid across the entire floor uninterrupted, and without influence of uneven, shrinking or expanding lumber. The other benefit of chamfered edges is that they offered a structural element to supporting the tile and mortar on their angled shoulders. The illustration below shows that the mortar is locked in place by the angled tops of the floor joists.
I’ve always enjoyed the history of houses that can be found in the fabric of old buildings in the attics, basements, behind the walls and under the floors. Sometimes we discover how the building was made, the quality of the craftsman, or the objects they’ve left behind. I am currently renovating a 1965 mid century modern house in Lutherville with my wife and after opening up one of the walls, I found a scrap of blue print with the original owner’s names, architect and year. This promptly went back into the wall for some future contractor or homeowner to find in another fifty years.
1Page 141, Suggestions for Setting Tile, by Karl Langenbeck. April 1907. Carpentry and Building, Vol. XXIX.-1907. New York, David Williams Company.
